Support: Road-View HD Dash Cam User Guide
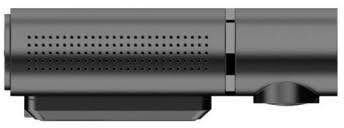
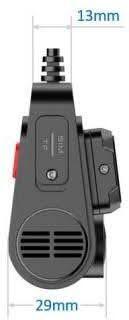
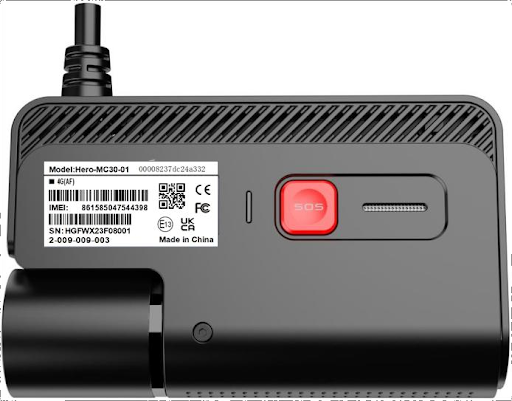
Product Interface

| LED | Description |
|---|---|
| White | The device is powered on, but it's within the first minute of startup. |
| Green | The device is connecting to the platform. |
| Blue | The device is actively recording. |
| Purple | The GPS function is working. |
| Red | The panic button has been activated. |
Quick Start Guide
Your VizTrack dash cam comes pre-installed with an industrial-grade SIM card and its microSD storage card.
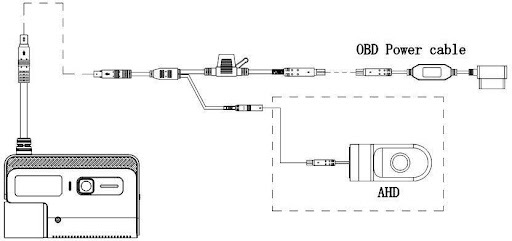
Step 1: Connecting the Dash Cam to the Power
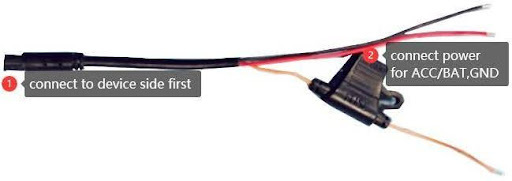
Option 1: 3-Wire Power Cable Method
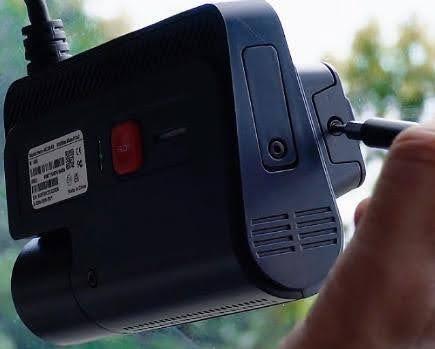
1. Connect the Power Cable:
- Plug the 3-wire power cable into the dash cam using the provided connectors.
2. Wire the Cables:
- Black Wire: Connect this to the ground (GND).
- Red Wire: Connect this to 12V power (ACC/BAT).
This will ensure your dash cam receives power from the car's electrical system.
Option 2: (Optional) OBD Power Cable Method
1. Connect the OBD Power Cable:
- Plug the OBD power cable into the dash cam using the provided connectors.
2. Connect to the OBD-II Interface:
- Insert the 16-pin OBD plug into your vehicle’s OBD-II interface to provide power.
This method simplifies the installation by using the vehicle’s OBD-II port for power.
Step 2: Mounting the Dash Cam to the Windshield
1. Choose the Ideal Position:
- Find the best spot on your windshield for the dash cam. Ensure it provides a clear view and does not obstruct your view while driving.
2. Clean the Area:
- Clean the chosen area on the windshield to ensure proper adhesion of the bracket.
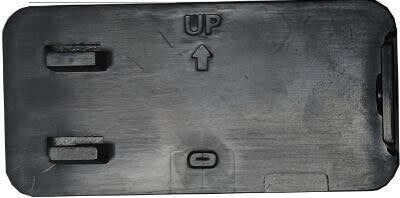
3. Attach the Bracket:
- Remove the plastic liner from the bracket.
- Attach the adhesive side of the bracket to the windshield.
- Ensure the bracket is securely fastened and the "UP" arrow on the non-adhesive side is pointing upward.
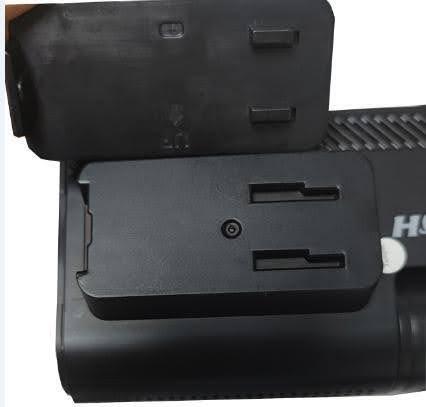
4. Install the Dash Cam:
- Slide the dash cam onto the windshield bracket.
- Make sure it locks securely in place.
5. Secure the Bracket Cover:
- Attach the bracket cover to the windshield bracket using the short screw.
Caution: Do NOT use the long screw as it may damage the device.
Step 3: Powering on the Dash Cam
1. Turn on the Vehicle:
- Turn the vehicle ignition switch to the ON position to power up the dash cam.
2. Connect to the Dash Cam’s Wi-Fi:
- Open the Wi-Fi settings on your smartphone and connect to the dash cam’s Wi-Fi access point.
3. Download and Open the Howen iTool App:
- On your smartphone, search for and download the Howen iTool app.
- Verify Information:
- In the app, check and verify that the following information is displayed correctly and up to date:
- Info
- Network
- Disk
- Satellite
This ensures that the dash cam is properly connected and functioning as expected.
Download User Manual
Click the attachment below to download the installation guide.
Video Safety System
-
Support: Introduction to the Video Safety System User Guide and Tutorial Video
Get started with an overview of the Video Safety System, its core features, and how to navigate the user interface. -
Support: Setting Up GPS Tracking and Monitoring in VSS User Guide and Tutorial Video
Learn how to configure GPS tracking, monitor vehicles in real-time, and review location history within VSS. -
Support: Taking and Using Snapshots with VSS User Guide and Tutorial Video
Discover how to capture, store, and use snapshot images from live or recorded video streams. -
Support: Live Video Streaming with VSS User Guide and Tutorial Video
Understand how to initiate and manage live video feeds directly from the VSS platform. -
Support: Recover Video Evidence from VSS User Guide and Tutorial Video
Follow step-by-step instructions to locate, download, and preserve important video evidence. -
Support: VSS App Guide
Explore the mobile app version of VSS—its features, settings, and how to stay connected on the go.
BrickHouse Locate GPS Tracking Platform
For comprehensive guidance on using the tracking platform, please refer to the dedicated support articles below:
-
Support: Locate GPS Site Guide
To view the complete and detailed guide for accessing and managing the tracking platform via the web interface, please visit the following link:
Access the full Locate GPS Site Guide -
Support: Locate GPS App Guide
For a thorough walkthrough of the Locate GPS mobile application, including setup and usage instructions for on-the-go tracking, please refer to:
Access the full Locate GPS App Guide
Thank you for choosing BrickHouse Security for your GPS tracking solutions. We are committed to providing you with reliable service and support.
If you require further assistance or have any questions regarding our products or services, please don’t hesitate to contact us through any of the following methods:
-
Phone: 800-654-7966
-
Live Chat: Available at BrickHouseSecurity.com
Our support team is here to help ensure you get the most out of your GPS tracking experience.
Mar 3rd 2024