Support: Configuring Notification Conditions
Notification conditions are set up during the first step of creating a notification.
Each condition type has its own settings and controls for when the notification will be triggered.
Address
This condition is triggered when a unit is either inside or outside a specific location.
Setup Steps:
1. Choose when the notification should trigger:
-
- Inside — when the unit is at the selected address
- Outside — when the unit is anywhere else
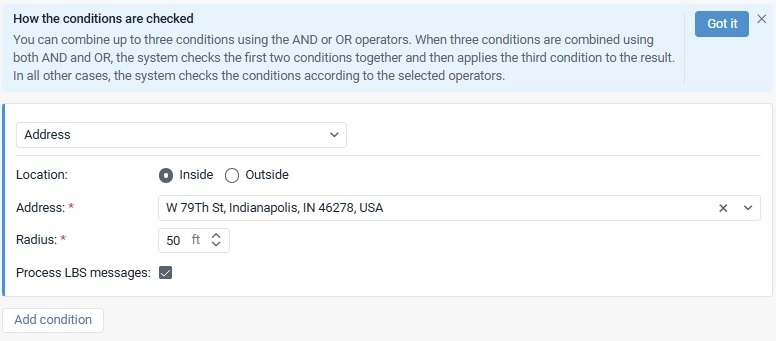
2. Enter an address in the Address field (city, street, house number, etc.) and select an option from the list.
Only addresses from the suggested list can be used.
3. Set the area size in the Radius field.
4. Enable Process LBS messages if you want to use cellular tower location data when GPS is weak or unavailable.
Note:
To use LBS:
- The device must support LBS
- Allow positioning by cellular base stations must be enabled in unit settings
Geofence Entry
This condition is triggered when a unit enters selected geofences.
Setup Steps:
1. Select one or more geofences or geofence groups from the list.
2. Move them to the selected list.
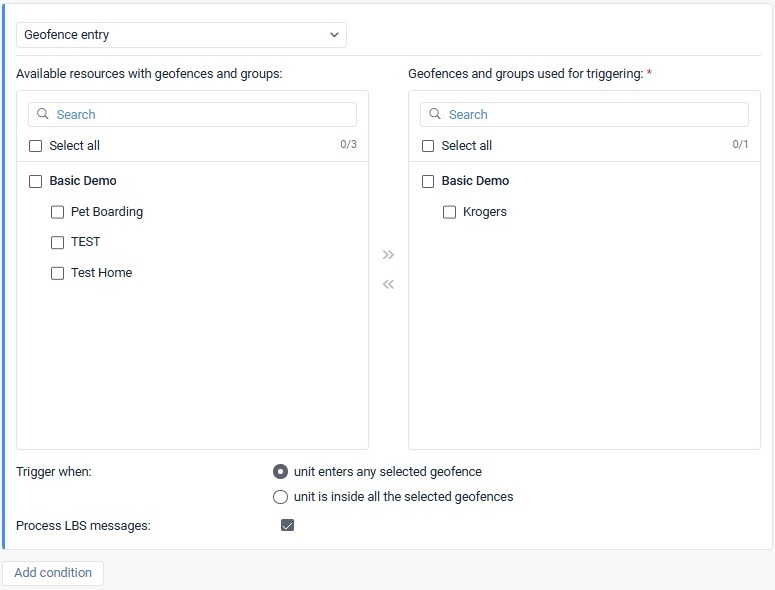
3. If multiple geofences are selected, choose:
-
- Enter any selected geofence — triggers when the unit enters any one of them
- Inside all selected geofences — triggers only when the unit is inside every selected geofence at the same time
4. Optional: Enable Process LBS messages
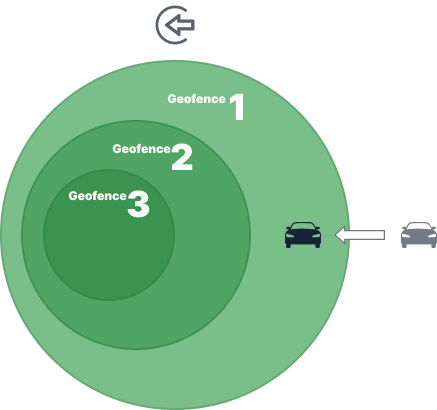
Example: Enter Any Selected Geofence
If Geofence 1, 2, and 3 are selected, the notification triggers when the unit enters any one of them.
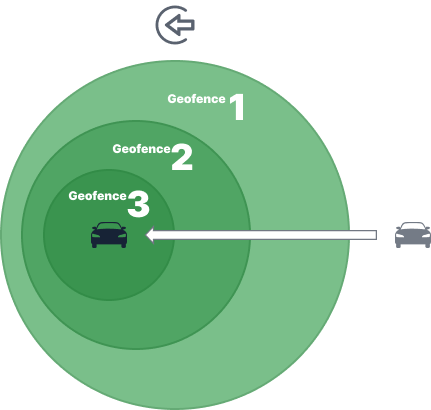
Example: Inside All Selected Geofences
The notification triggers only when the unit is simultaneously inside all selected geofences.
Geofence Exit
This condition is triggered when a unit leaves selected geofences.
Setup Steps:
1. Select geofences or groups
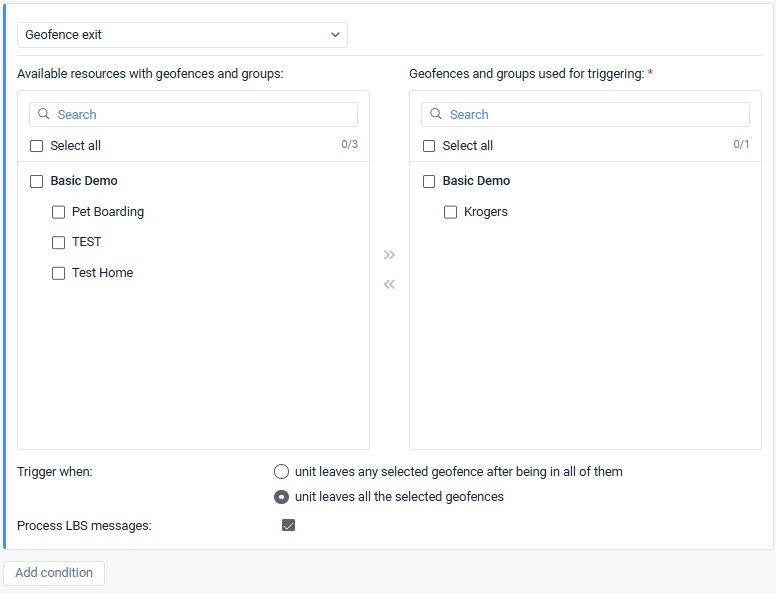
2. Move them to the selected list
3. If multiple geofences are selected, choose:
-
- Leave any selected geofence after being in all of them
- Leave all selected geofences
4. Optional: Enable Process LBS messages
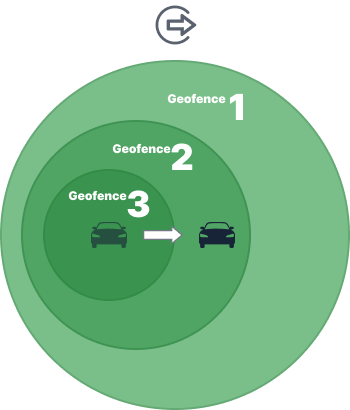
Example: Leave Any Selected Geofence After Being in All
The unit must first be inside all selected geofences.
The notification triggers when it exits any one of them.
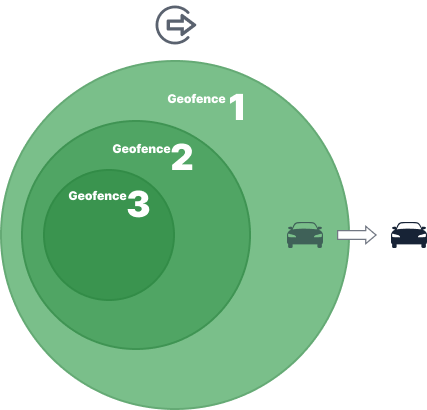
Example: Leave All Selected Geofences
The notification triggers only when the unit is outside every selected geofence.
Unit Proximity
This condition monitors whether one unit approaches or moves away from other units.
Setup Steps:
1. Choose:
-
- Approaches another unit
- Moves away from another unit
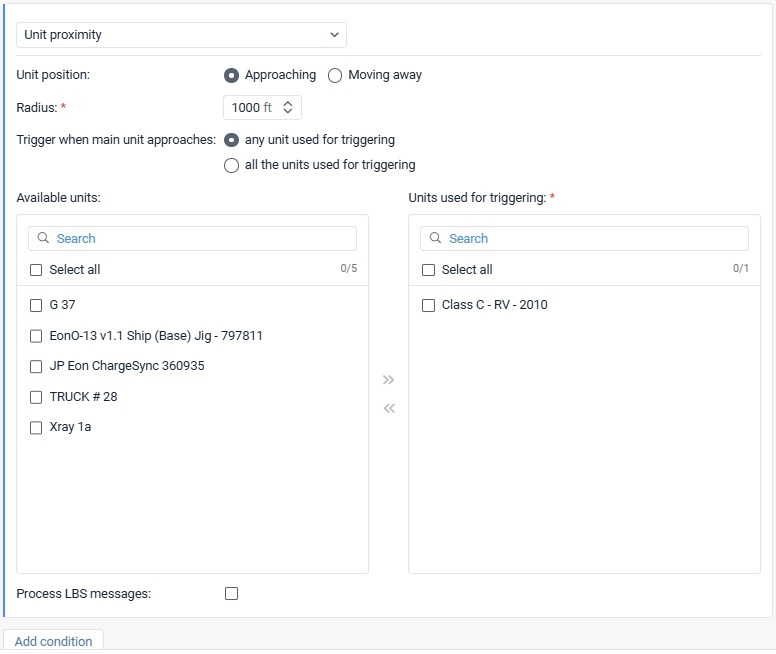
2. Set the trigger distance in the Radius field
3. If multiple units are selected, choose:
-
- Any selected unit
- All selected units
4. Select the units to monitor
5. Optional: Enable Process LBS messages
Example: Approach
If the radius is 1000 m, the notification triggers when the main unit comes within 1000 meters of another selected unit.
Example: Move Away
The main unit must first be within the radius, then move beyond it.
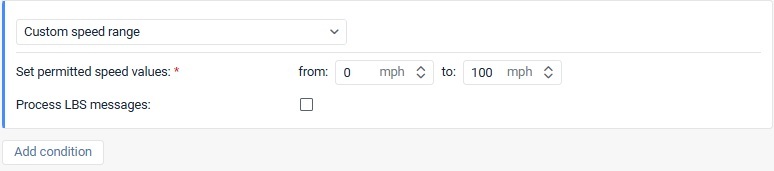
Custom Speed Range
This condition triggers when the speed goes above or below a set range.
Setup:
- Define your minimum and maximum speed limits
- Optional: Enable Process LBS messages
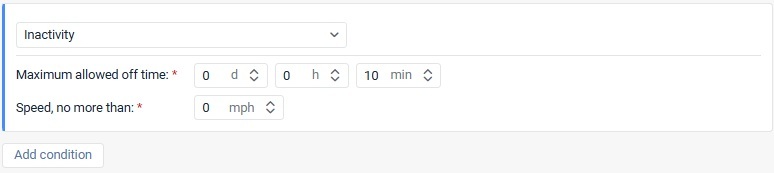
Inactivity
This condition monitors how long a unit stays below a certain speed.
Settings:
- Max allowed off time — how long the unit can remain inactive
- Speed, no more than — speed threshold considered stationary
Example:
If speed stays below 3 km/h for 15 minutes, the notification triggers.
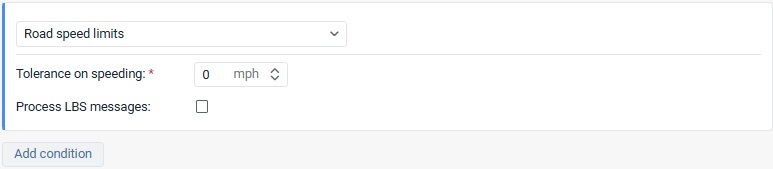
Road Speed Limits
This condition triggers when the vehicle exceeds the map speed limits.
Setup:
- Set Tolerance on speeding (allowed speed above map limit)
- Optional: Enable Process LBS messages
Alarm
This condition triggers when the device sends an alarm message.
Setup:
- No additional configuration required

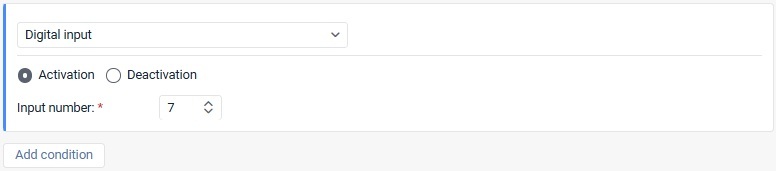
Digital Input
This condition monitors device input activation or deactivation.
Setup:
- Select input number (1–32)
- Choose:
- Activation
- Deactivation
Note:
To monitor both states, create separate conditions.
Parameter State
This condition monitors specific device parameters.
Available Control Types:
- Value range: Monitor numeric values inside or outside a range
- Text mask: Monitor text values using wildcard patterns
- Parameter availability: Trigger when the parameter exists
- Parameter lack: Trigger when the parameter is missing
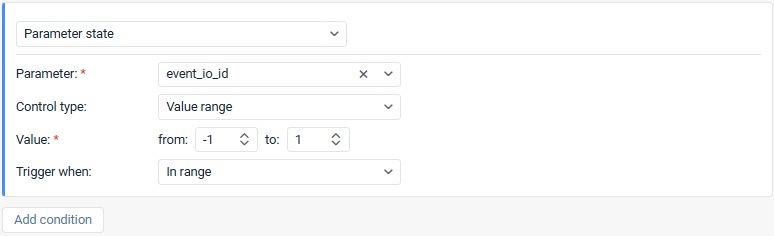
Value Range:
- Set minimum and maximum values
- Choose:
- In range
- Out of range
Sensor Range
This condition checks whether sensor values stay inside or outside a set range.
Setup:
1. Select sensor type or sensor name
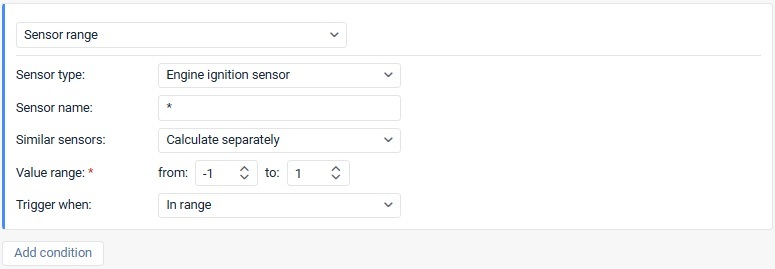
2. Choose:
-
- Sum up values
- Calculate separately
3. Set minimum and maximum values
4. Choose:
-
- In range
- Out of range
Sensor Value
This condition tracks sensor value changes based on delta.
Setup:
1. Select sensor
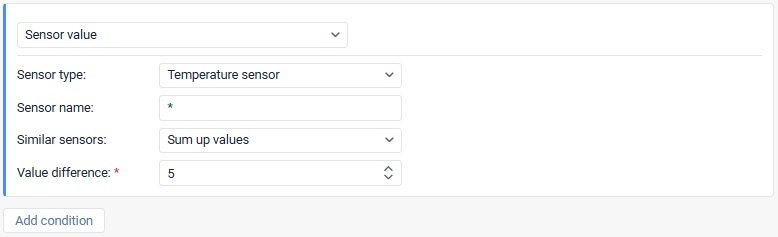
2. Choose:
-
- Sum up values
- Calculate separately
3. Set Delta
Important:
The notification triggers only when the change in value exceeds Delta.
Example:
To trigger on a change of exactly 1, set Delta to 0.9.
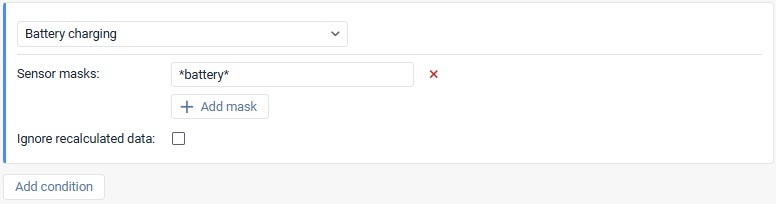
Battery Charging
This condition monitors battery charging events.
Setup:
- Add sensor masks
- Optional: Enable Ignore recalculated data
Rule:
If combined with other conditions, Battery Charging must be first.
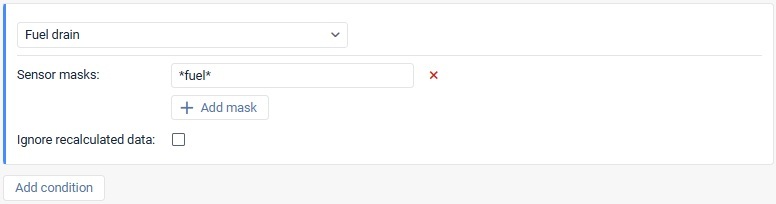
Fuel Drain
This condition detects fuel loss.
Setup:
- Add fuel sensor masks
- Optional: Enable Ignore recalculated data
Rule:
If combined, Fuel Drain must be first.
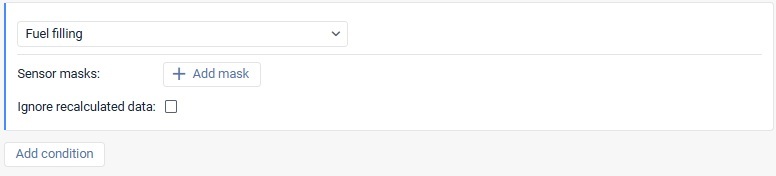
Fuel Filling
This condition detects refueling.
Setup:
- Add fuel sensor masks
- Optional: Enable Ignore recalculated data
Rule:
If combined, Fuel Filling must be first.
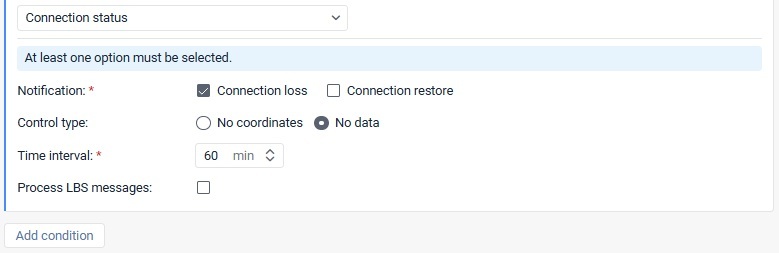
Connection Status
This condition monitors connection loss or restore.
Setup:
- Select:
- Connection loss
- Connection restore
- Choose control type:
- No coordinates
- No data
- Set time interval
- Optional: Enable Process LBS messages
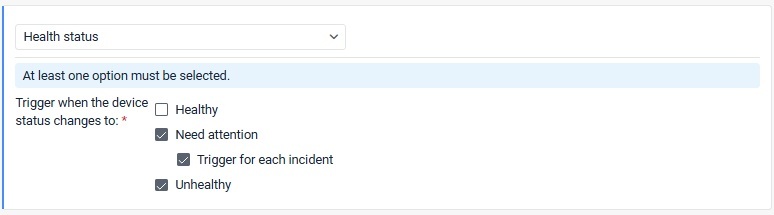
Health Status
This condition monitors device health.
Options:
- Healthy
- Need attention
- Unhealthy
Note:
This condition cannot be combined with others.
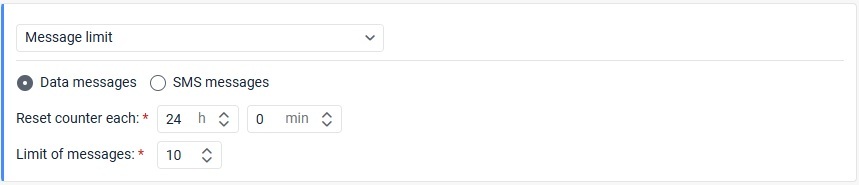
Message Limit
This condition monitors the number of messages within a time period.
Setup:
- Select:
- Data messages
- SMS messages
- Set reset interval
- Set message limit
Note:
Cannot be combined with other conditions.
SMS
This condition triggers when an SMS is received.
Setup:
- Use * for all SMS messages
- Use text masks for specific SMS content
Note:
Cannot be combined with other conditions.

Driver Assignment
This condition tracks driver assignment or separation.
Setup:
- Choose Assignment or Separation
- Optional: Enter driver code or mask
Note:
Cannot be combined.

No Driver Assigned
This condition checks if no driver is assigned.
Important:
- Cannot be the first condition
- Can only be second or third

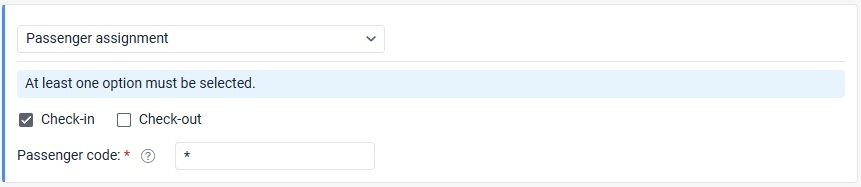
Passenger Assignment
Tracks passenger check-in or check-out.
Setup:
- Select Check-in and/or Check-out
- Optional: Enter passenger code
Note:
Cannot be combined.
Passenger Not Separated
Triggers when a passenger remains assigned too long.
Note:
Cannot be combined.

Trailer Assignment
Tracks trailer assignment or separation.
Setup:
- Choose Assignment or Separation
- Optional: Enter trailer code
Note:
Cannot be combined.

Maintenance
The Maintenance condition is used to monitor service intervals created in the Service intervals tab of the unit properties.
This helps track upcoming or overdue maintenance based on mileage, engine hours, or time.
How to Configure Maintenance
Step 1: Select the Type
Choose when the notification should trigger:
- Service term approach — triggers before the service deadline
- Service term expiry — triggers after the service deadline has passed
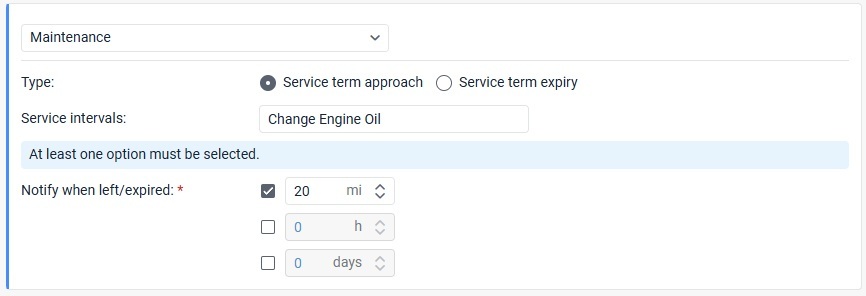
Step 2: Select Service Intervals
In the Service intervals field, enter the name of the service you want to monitor.
Tips:
- Use the exact service name for one interval
- Use a text mask to monitor multiple services
- * (default) monitors all service intervals
Step 3: Set Notification Thresholds
Under Notify when left/expired, choose when the notification should trigger based on:
- Kilometers (km)
- Hours (h)
- Days
You must select at least one option.
Example
A vehicle requires maintenance every 15,000 km.
- Service interval: 15,000 km
- Notification type: Service term approach
- Notify when left: 1,000 km
Result:
The notification triggers when mileage reaches 14,001 km, meaning only 999 km remain before service is due.
Important Rules
Cannot be Combined
The Maintenance condition must be used alone and cannot be combined with other notification conditions.
Trigger Behavior
- The notification triggers only once when any selected threshold is reached
- After maintenance is completed, you must register the service in:
- Event Registrar, or
- Unit Properties
This resets the service interval for future notifications.
Special Notes
If the condition monitors multiple or all service intervals:
- Notifications stop if at least one monitored service becomes overdue
When Maintenance Notifications Will Not Trigger
This condition will not work if:
- At least one specified service is already overdue when the notification is created
- The unit has no messages with location data
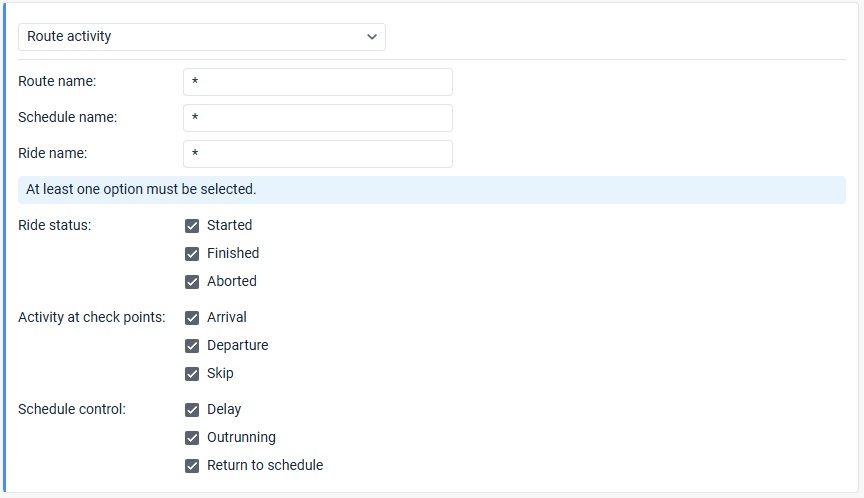
Route Activity
Monitors route progress and schedules events.
Setup:
- Enter route, schedule, or ride masks
- Select events:
- Started / Finished / Aborted
- Arrival / Departure / Skip
- Delay / Outrunning / Return to schedule
Note:
Cannot be combined.
Related Articles
Support: Locate GPS New Notification Builder
Support: Locate GPS Notification Condition Types and Combination Rules
Support: Setting Notification Limits and Schedules
Support: Configuring Notification Actions
Thank you for choosing BrickHouse Security for your GPS tracking solutions. We are committed to providing you with reliable service and support.
If you require further assistance or have any questions regarding our products or services, please don’t hesitate to contact us through any of the following methods:
-
Phone: 800-654-7966
-
Live Chat: Available at BrickHouseSecurity.com
Our support team is here to help ensure you get the most out of your GPS tracking experience.
Oct 31st 2024